This year we had an ornament competition at the Irving Art Association. Member-created ornaments were hung at our gallery at the Jaycee Park Center for the Arts for the Holiday Art Exhibit. Prizes will be awarded!
For some creative ideas, I browsed through YouTube and discovered “How To make a Paper Ball Christmas Ornament”, which launched this project.
Basically you start by cutting papers in a circle, so I decided to use my new round 8″ Gelli Plate to create the design. I used papers I had already printed but weren’t finished art. I added a circular print using my new plate with a metallic acrylic paint. The prints were made on cardstock, but I think you could use anything that wasn’t too fragile for gelli printing.
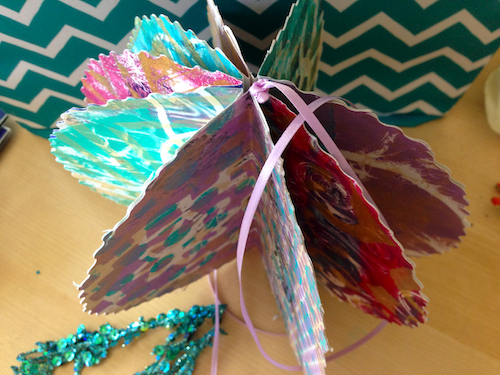
So then I cut out eight circles following the printed circle design, folded them in half with the printed side inside, and glued the the unprinted sides together. (More circles than eight might be better). I used a glue stick, but the video shows how to do it with a hot glue gun. Before I glued the very last side, I attached a ribbon in the center section to hold the ball. I knotted the ribbon above and below the Gelli-Ball to reinforce it and glued it in place.
Because the circles weren’t cut perfectly, they were uneven. So I used fancy scissors with decorative edges to cut a scalloped edge. I also attached a spray of turquoise sequins as a weight underneath.
So many design possibilities for this idea! Adding bells, beads or fringe as a weight would be a nice touch. Besides using ribbon to hang the ball, consider string, yarn, cord, fine chain, pipe cleaners, skewers, etc. Edge treatment could be plain, cut, scalloped, bordered or decorated. Experimenting with different kinds of paper would be fun, and the “ball” doesn’t have to be round. The balls could be strung in a chain or grouped like a mobile. And of course the design created on the Gelli printed papers could be anything — it doesn’t have to be holiday-related. This would be an interesting way to display kid’s art.

glue the unprinted sides together
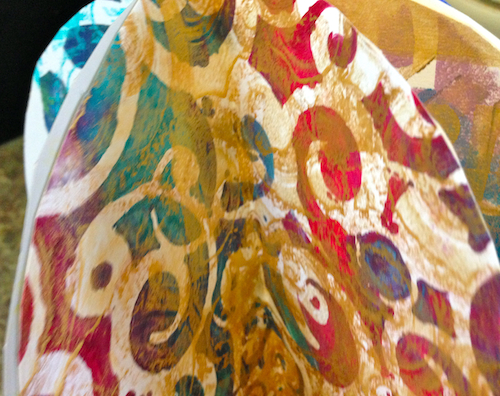
detail, showing the edges before they were scalloped